Saturday, September 29, 2018

How to Balance Columns

Some documents require the user to format the text into columns. Formatting into columns can be a tricky process if the user is a novice, but with this simple process any user can create a beautifully formatted document.


The user should begin with a new, blank document. Before typing begins the user should click the PAGE LAYOUT tab, then the Hyphenation button, and then Hyphenation Options to open the Hyphenation dialog box.


In the Hyphenation dialog box, the user should click the empty box beside Automatically hyphenate document and change the Limit consecutive hyphens to 2. Then, click OK. Hyphenating the document before typing begins prevents the user from forgetting this important step. The user can now completely type the text for the document.


After typing is complete, the user should position the cursor in front of the very first text character of the body of the document. Then, scroll to the end of the document and hold the SHIFT key while clicking the cursor after the last period of the document. This will select the body of the document, omitting the empty paragraph markers at the beginning and end of the document.


With the body text selected, the user should then click the Columns button on the PAGE LAYOUT tab. Then, choose the number of columns for the document.


After the columns are created, while the text is still selected the user should click the HOME tab, and then the Justify button. This causes the text on each side of each column to align.


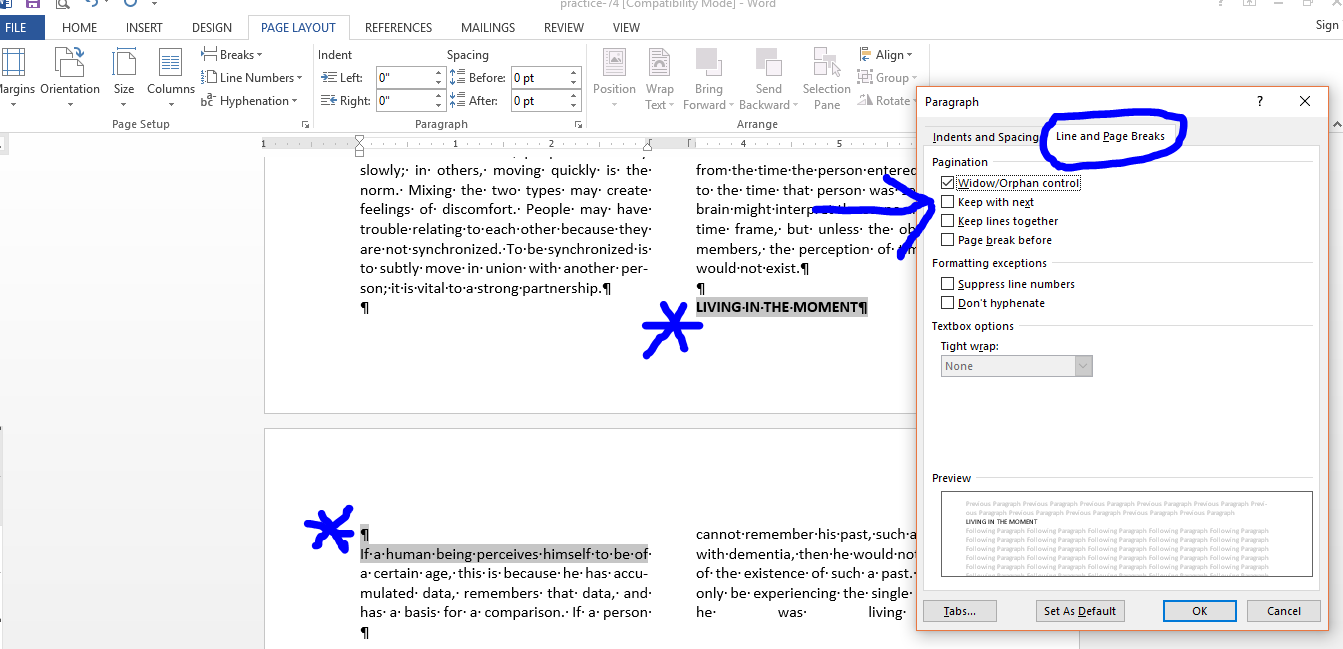
If the creation of the columns separates headings from their corresponding text the user should select the heading, the space, and the first line of corresponding text. Then on the PAGE LAYOUT tab, open the Paragraph dialog box and click on the Line and Page Breaks tab. The user should then click the empty box beside Keep with text.


The heading then moves to the second page with the corresponding text. Notice the large spaces between the last four words of the document.


To correct these spaces the user should click just after the period and press the ENTER key. This action will tighten up the spacing in the last line by creating a Continuous Section Break.


By following these simple steps a beautiful document with balanced columns was created.

Monday, September 24, 2018

How to Add AutoCorrect Exceptions

Word automatically capitalizes the first word in every sentence to help users from making accidental typographical errors. If the user needs Word to not capitalize something, for instance reference initials, there are a couple of different ways to do it. The easy way is to disable the AutoCorrect option to automatically capitalize the first word of every sentence, but then the user is at risk of making needless errors. Another way is to add the initials to the AutoCorrect exceptions list. To begin click on the File tab, then click Options at the bottom of the screen.


When the Word Options menu opens, the user should click Proofing, and then click AutoCorrect Options.


This will open the AutoCorrect menu. On the AutoCorrect tab, the user should click the Exceptions button to open the AutoCorrect Exception menu.


Then, the user should click the Other Corrections Tab. Next, the user can type the initials in the blank text box beside the Add Button, and then click Add.


After clicking the Add Button, the initials are moved to the list below the text box.


Then, the user should verify that the entry is correct. If not, click the incorrect entry and click Delete. If the exception is correct the user can then click OK on the AutoCorrect Exceptions menu, the AutoCorrect menu, and the Word Options menu. The users reference initials should now be an exception to the AutoCorrect program.

Saturday, September 15, 2018

How to Remove and Selectively Apply Boarders in a Word Table

Some tables look more polished if the boarders are removed, and sometimes a user may want to highlight certain information contained in a table. Knowing how to remove and selectively apply boarders to a table is something any word user should learn.


The first step is to highlight the table by clicking the box located in the upper-left corner of the table.


Then, on the Table Tools Design tab click the Boarders box. This action opens a drop-down list with different boarder options. Click the No Boarder option to remove all boarders from the table. If the user wants a table with no lines this is the last step, but if the user would like to highlight certain information then a few more steps are necessary.


First, the user must highlight the line or lines (press CTRL while clicking to highlight multiple lines) that they would like to highlight.


Then, on the Table Tools Design tab click the Boarders box again, opening the drop-down list with the boarder options. The user would then choose the options that would best highlight the information in their table. Bottom Border and Top Border work well in many situations.


The user and situation determine the final result.This situation highlights the title and total lines of the table. Adding a table to a word document can result in a professional looking presentation if the user is well informed of the many table features offered in Microsoft Word.

Tuesday, September 4, 2018

How to Set Left Tab for Modified Block Letter

When a new blank Word document is opened the only tabs located on the ruler are the page margins. If the tab key is pressed the text will indent by the default one half an inch. For a letter written in modified block style the user will need to set a left tab indent of 3.25 inches.


To begin, the user will click the paragraph settings button located on the HOME tab.


Next, the user will click the TABS button located at the bottom of the paragraph settings window. This will open the TABS window.


When the TABS window opens, the user needs to type 3.25 in the box labeled Tab stop position, confirm the alignment is left, confirm the leader is none, and then click the SET button.


After the SET button is pressed, the TABS window remains open and the new tab stop position appears in the tab stop positions box. The user can then click the OK button.


After the OK button is pressed, the document now has a left tab stop in the 3.25 position on the ruler along with the original tab stops that indicated the page margins.


Any tabs stop positions can be obtained by following these simple steps. 

How to Use Mail Merge

Mail Merge allows a user to create, and easily combine a letter with a mailing list, thus creating individual letters for each person on the...